This guide is designed to help both novices and experienced DIY enthusiasts navigate the process with ease. From selecting the right materials like F channels and J channels to understanding the best installation techniques, we provide step-by-step instructions to ensure a successful project.
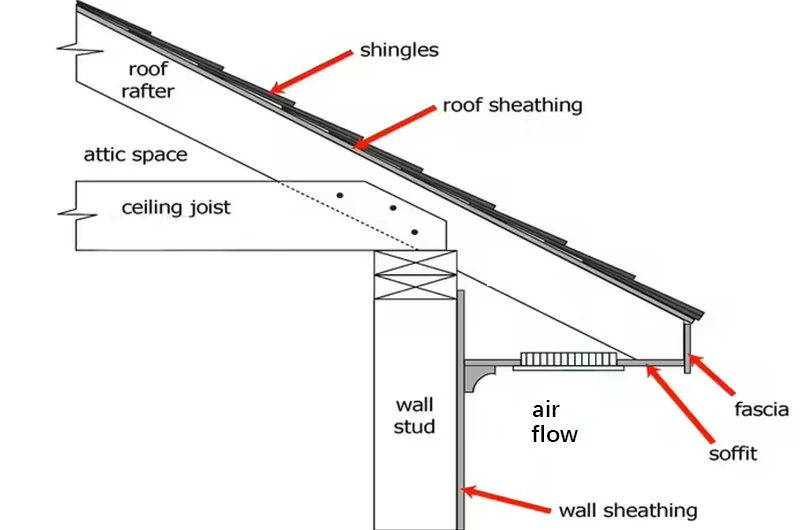
The eaves structure mainly includes the soffit and fascia. The soffit covers the underside of the eaves, while the fascia covers the outer surface of the eaves.
The soffit, positioned between the wall and eaves, protects against moisture and pests, and enhances aesthetics, usually matching the exterior wall's color and texture.
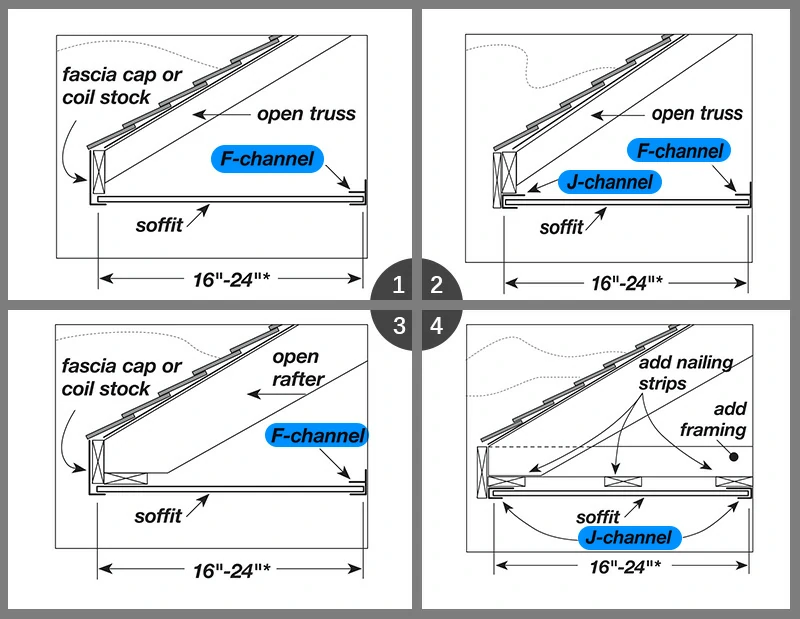
The fascia extends along the eaves' edge, decorating and protecting the wooden structure below. Ventilated soffits provide attic ventilation, and solid soffits are used in non-ventilated areas. For soffit installation, choose the appropriate J-channel or F-channel to secure the panels.
The necessity of installing soffits
Soffits play a crucial role in the exterior of a house. Installing soffit panels enhances the home's aesthetics and provides essential protection. Soffits cover the underside of the eaves, shielding against weather and pests, and preventing wood rot and structural damage from moisture accumulation.
They are also part of the ventilation system, promoting airflow in the attic and preventing mold growth.
Aluminum soffits and fascias require minimal maintenance, resist peeling or rotting, and have a long lifespan. Ventilated soffits can be fully vented or combined with solid panels to ensure proper airflow while keeping pests out.
Material selection
Wood: wood is aesthetically pleasing and customizable with paint, but it is prone to rot, warping, and insect damage, requiring regular maintenance.
Aluminum: aluminum is lightweight, durable, and resistant to corrosion and fading, with a lifespan of up to 20 years. However, it has a higher initial cost, and low-quality aluminum should be avoided.
Vinyl: vinyl is durable, maintenance-free, and doesn't need painting, but it has limited color and style options. It is less durable than aluminum and has a higher initial cost than wood.
Choosing the right material involves considering maintenance, functionality, appearance, initial cost, and long-term maintenance expenses. Consulting a professional is recommended to select the best material for your needs.
Material preparation
- Soffit panels
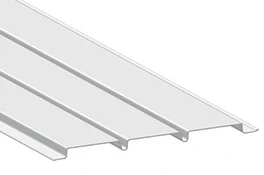
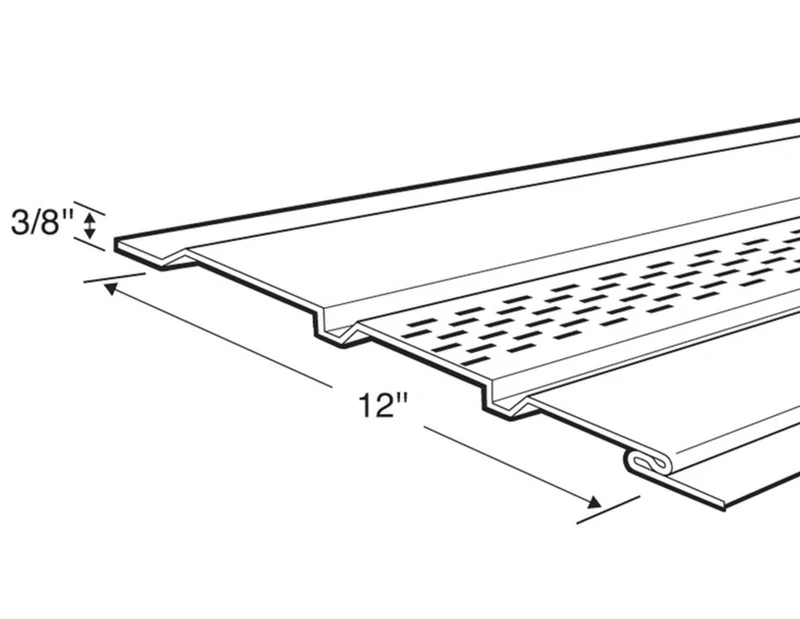
Soffit panels are used under eaves, porches, and window sills. They come in common widths of 12" and 16" and are available in vented and non-vented types. Vented soffits have thousands of perforations allowing air circulation while preventing insect entry, whereas solid (non-vented) soffits lack these perforations. These panels can be made from various materials, including wood, aluminum, vinyl, and fiber cement.

- Eaves fascia
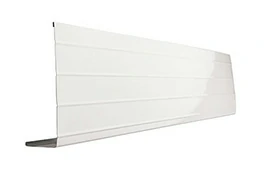
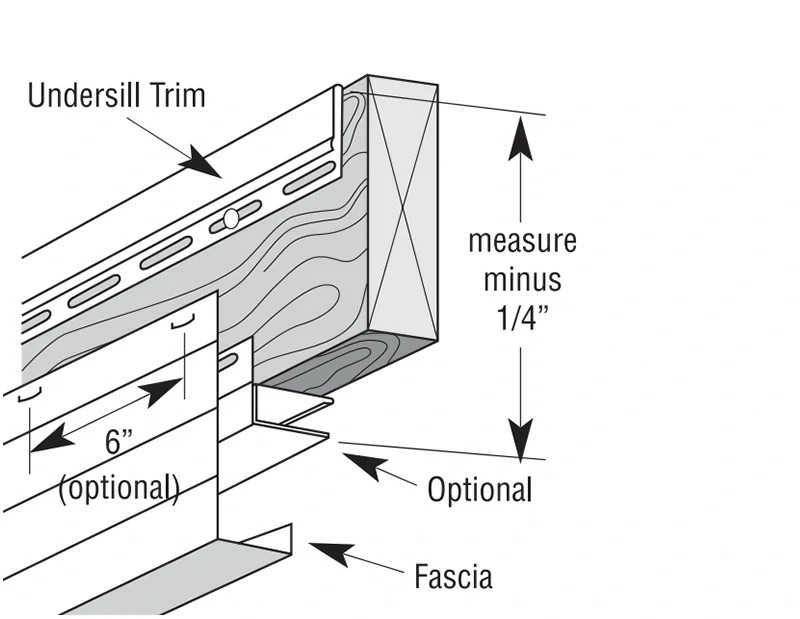
The eaves fascia is installed along the edge of the eaves, covering the wooden fascia board with a bottom lip that overlaps the outer edge of the installed arch. It serves as a building material for shielding from wind and rain, drainage, and decorating the exterior of houses. It comes in standard widths of 6 inches and 8 inches, and it's important to measure the width of the wooden fascia board in advance to determine the appropriate purchase width.
- J-channel
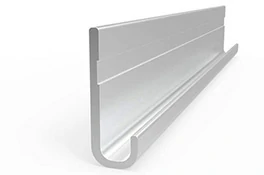
The j-channel is a narrow molding used to install around openings such as arches, corners, edges, and panels. It accommodates arches snugly against the house. Typically used to secure uncovered arch edges, it offers advantages such as durability and ease of installation.
- F-channel
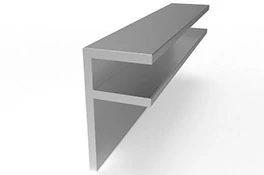
The f-channel is a groove installed on house beams or posts, typically located under the eaves. It provides a shelf channel where the end of an arch can securely fit, ensuring a robust installation under the eaves. It serves as essential support for arches, preferred by builders for installing arches.
Installation steps
Step 1: install the receiving channel
Begin by installing the appropriate support channel to hold the fascia boards, choosing accessories like f-type or j-type channels. It's best to select a method that integrates most effectively with the construction techniques used to create the eaves. Typically, f-type channels are chosen for positions near the walls, while j-type channels are used at the roof edge for the fascia boards.
- Nail a channel every 8 inches to 12 inches (203 mm to 305 mm), positioning the nails at the center of the channel.
- At corners, notch the top and back of the channel, matching the notch width to the fascia board, and cut the bottom to extend beyond the width of the next fascia board.
- Cut adjacent components at a 45-degree angle to simulate a mitered corner appearance.
- Ensure to leave a 1/4 inch (6.4 mm) expansion space at each adjacent wall.
Step two: cutting fascia boards
- Measure the distance from the wall to the fascia board at several points to ensure consistent fascia depth.
- When cutting, subtract 1/4 inch (6.3 mm) to allow for adequate spacing.
- Adjust the cutting length as the distance varies.
Step three: securing fascia boards
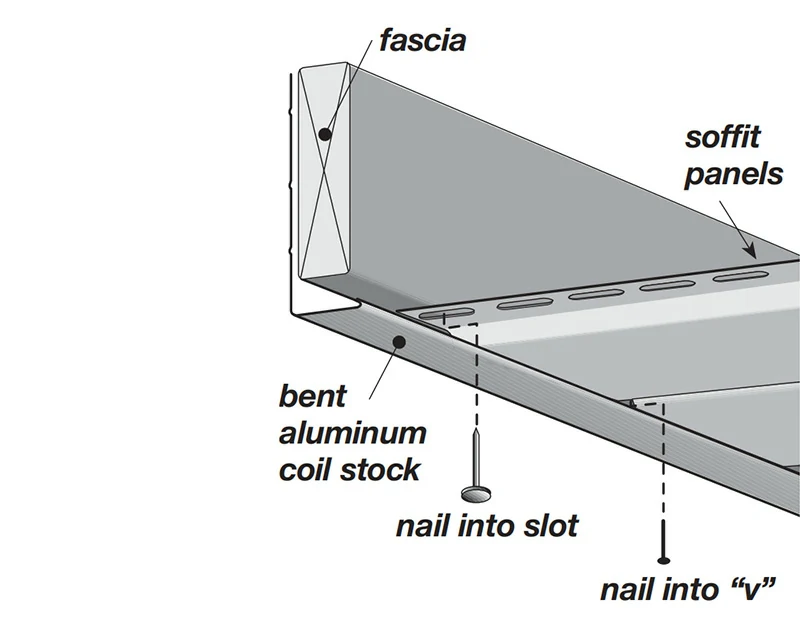
- Slide the first fascia board into the f-channel, snug against the wall with the groove facing the installation direction, and secure it onto the wooden fascia board.
- Use 1-1/2 inch fascia nails or screws driven into each outer center groove.
- Slide subsequent fascia boards into the groove of the previous board, while sliding into the f-channel on the side closest to the wall, continuing to secure with fascia nails.
Step four: corner fixation
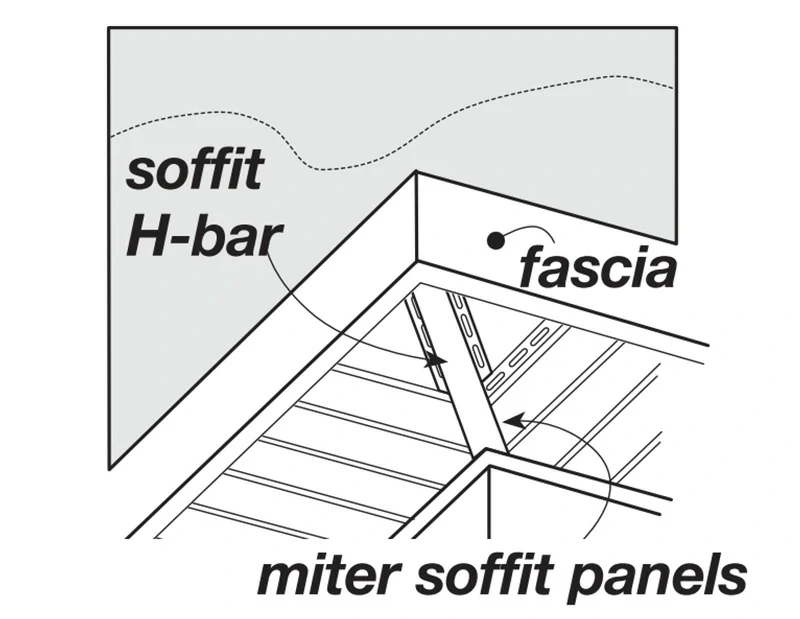
- At corners, measure the channel from the wall to the eave corner, subtracting 1/4 inch (6.4 mm) for a 45-degree cut.
- Install arch belly double-channel wires, diagonal separators, or h-shaped dividers, and drive installation nails to secure support.
- Insert the diagonally cut arch belly panels into the groove sequentially as before, and secure them with arch belly nails.
Step five: installing eaves
- Measure and vertically cut the panel eaves, creating two 45-degree notches at the bottom edge for corners, and bend with a square ruler.
- Slide the eaves along the top into the drip edge, hooking the bottom of the eaves under the J-channel.
- Pre-drill holes on the fascia, then secure the fascia with decorative nails, nailing every 24 inches and avoiding over-tightening.
When installing arches, use F-channels and J-channels
F-channels
F-channels are commonly used for arch installation, providing finished edges without needing additional support. Their design allows for quick and easy installation, typically secured to house beams or posts, offering stable support. They are suitable for new construction and most arch installations.
J-channels
J-channels are traditionally used for window and door trim but are also commonly used for arch installation. During installation, nails or flanges need to be secured to the support structure, such as old arches or new wood. J-channels enclose the end of the wall panels, creating a seamless appearance, but their installation complexity is slightly higher.
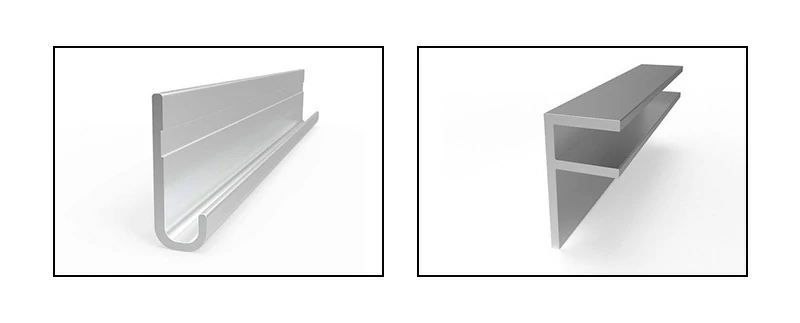
In general, f-channels are specifically designed for arches, offering easy and quick installation. J-channels, on the other hand, are versatile but require additional support when used for arch installation, making them suitable for complex structures. The choice depends on specific needs and existing structures. Whether you install f-channels or j-channels, it's important to leave sufficient space for expansion and contraction in arch panels, soffits, and other roof parts.
Top material choice - more durable and easy to install
Mastar is dedicated to providing high-quality aluminum roofing materials. Our products offer exceptional durability and ease of installation, ensuring your project is efficient and long-lasting. Whether for new construction or renovation projects, our f-channels and j-channels perfectly meet your needs, offering sturdy support and an attractive finished edge. Choose mastar to help you achieve excellent roofing solutions.


